Last Updated on March 20, 2026 by Sabrina Currie
The best and simplest fermented radishes you'll ever taste. Simple, lacto-fermented radishes become naturally pickled with just 4 ingredients. So yummy in salads, on tacos, in your sandwich and more!

Why I Made This Recipe
I learned how safe and easy lacto fermenting actually is while researching for a magazine article. After I started playing around with fermenting different foods, I was hooked! (Learn more about The Difference Between Turnip vs Radish here.)
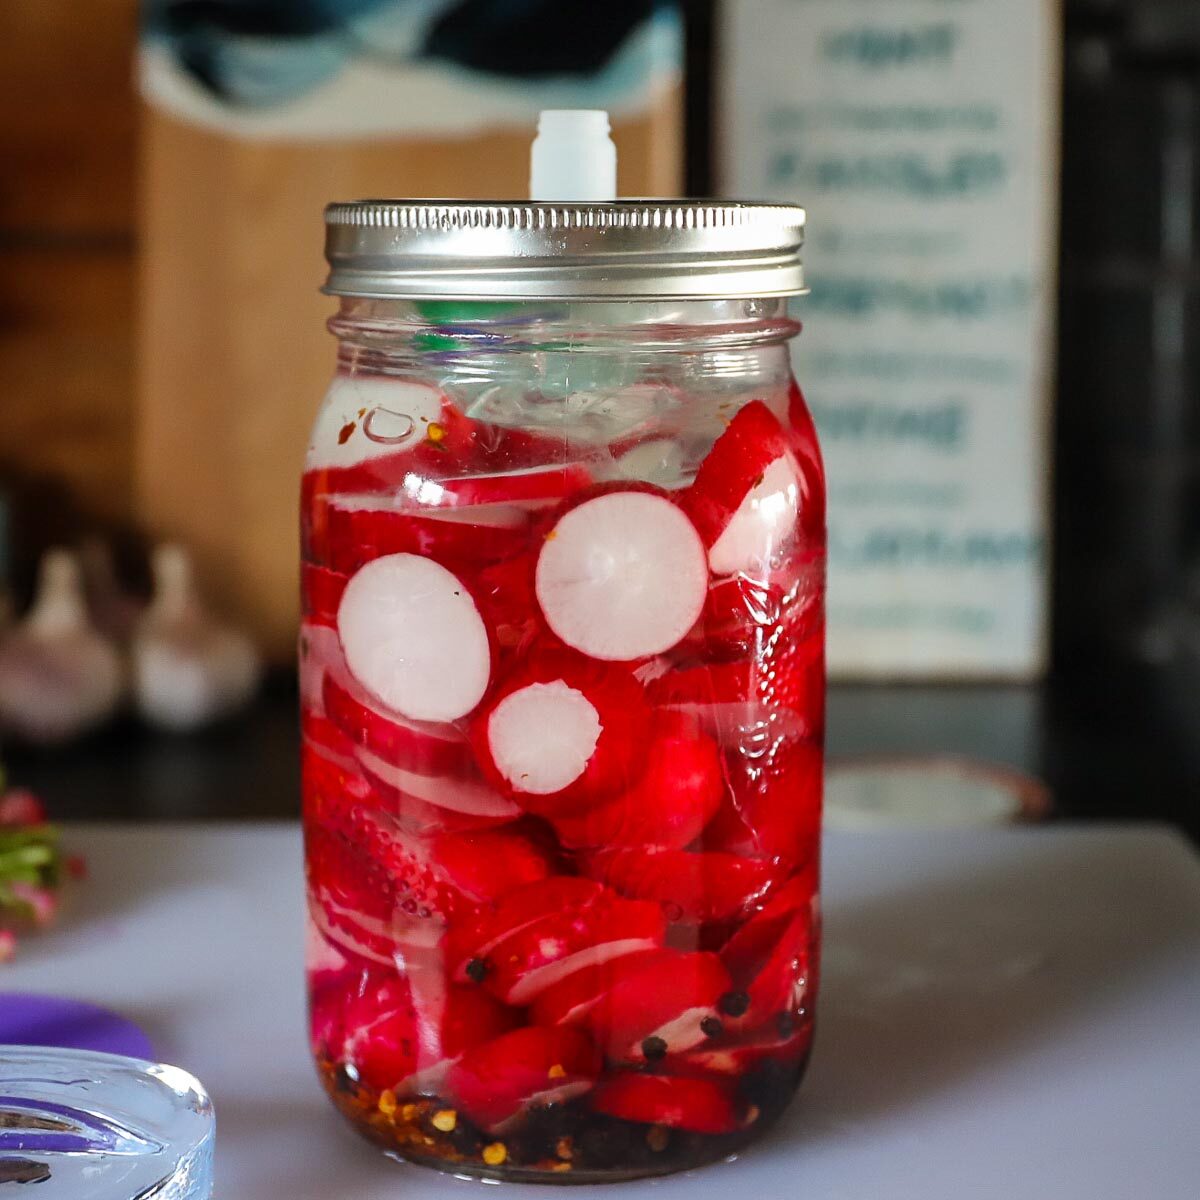
Fermenting is a surprisingly simple process. The result is a distinct tart and complex flavor full of healthy probiotic bacteria that is great for gut health. Fermented radishes are my favorite of the ferments. Mildly sweet, sour and crisp, I love topping fish tacos or cheesy sloppy joes with these.
For more awesome probiotic veggies, check out my Red Cabbage Sauerkraut/Fermented Red Cabbage and Lacto Fermented Garlic Scapes.
What does "lacto ferment" mean?
Lacto fermentation is lactic acid bacteria that either occurs naturally or is introduced to food to simply and effectively preserve food. Fruit and vegetables naturally contain the right bacteria (lactobacillus) to do this job with little intervention from you, creating a naturally pickled flavor.
The lactobacillus breaks down sugars and turns them into an acidic brine, lactic acid. You are probably familiar with some of the foods produced this way that you may already purchase at the grocery store. Common fermented foods include yogurt and kefir, pickles, sauerkraut, kimchi, miso and even fish.
Step by step instructions
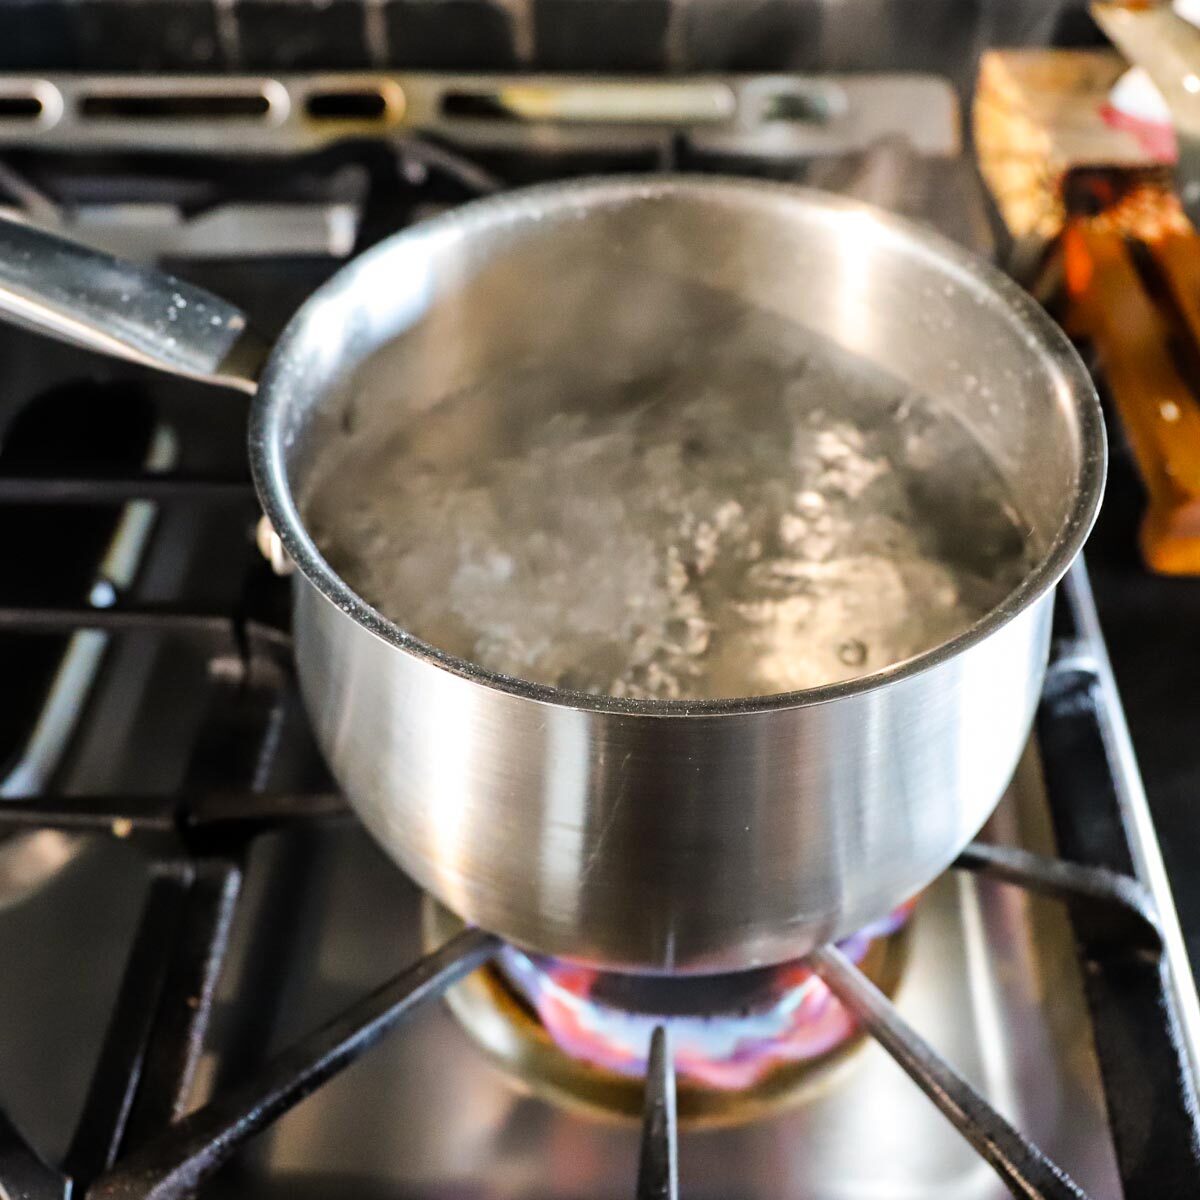
- You will need to start with filtered or dechlorinated water. You could buy your water but it's easiest (and cheapest) to boil your own tap water for 20 minutes and then let it cool. I like to measure the water and add the salt for the brine while the water is hot. This allows the salt to dissolve easily.
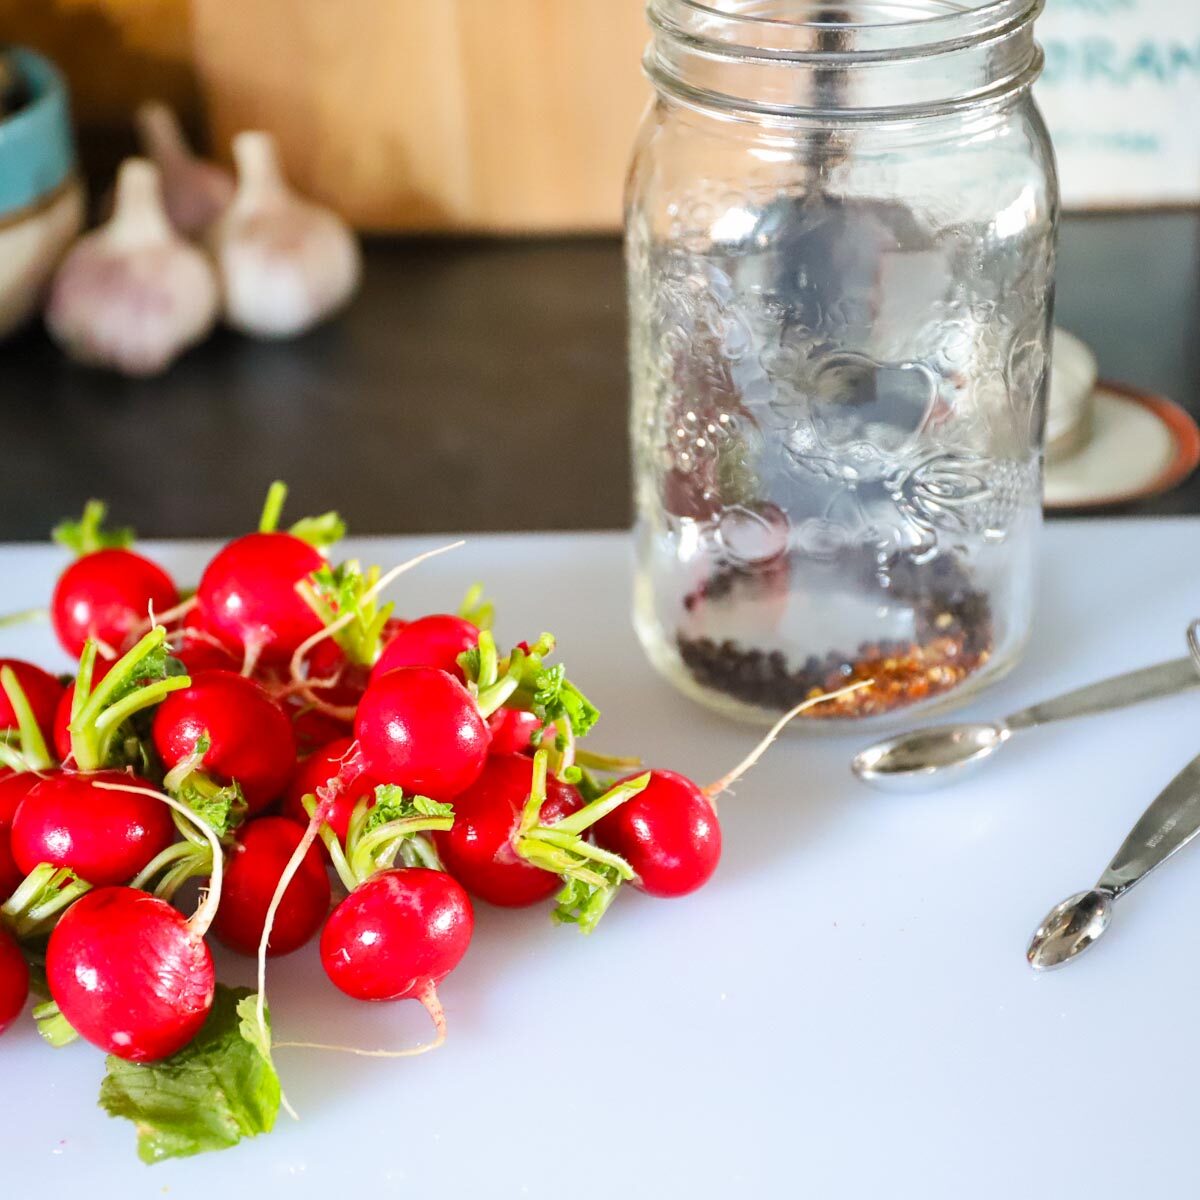
2. Place peppercorns and red pepper flakes in the bottom of each quart jar.
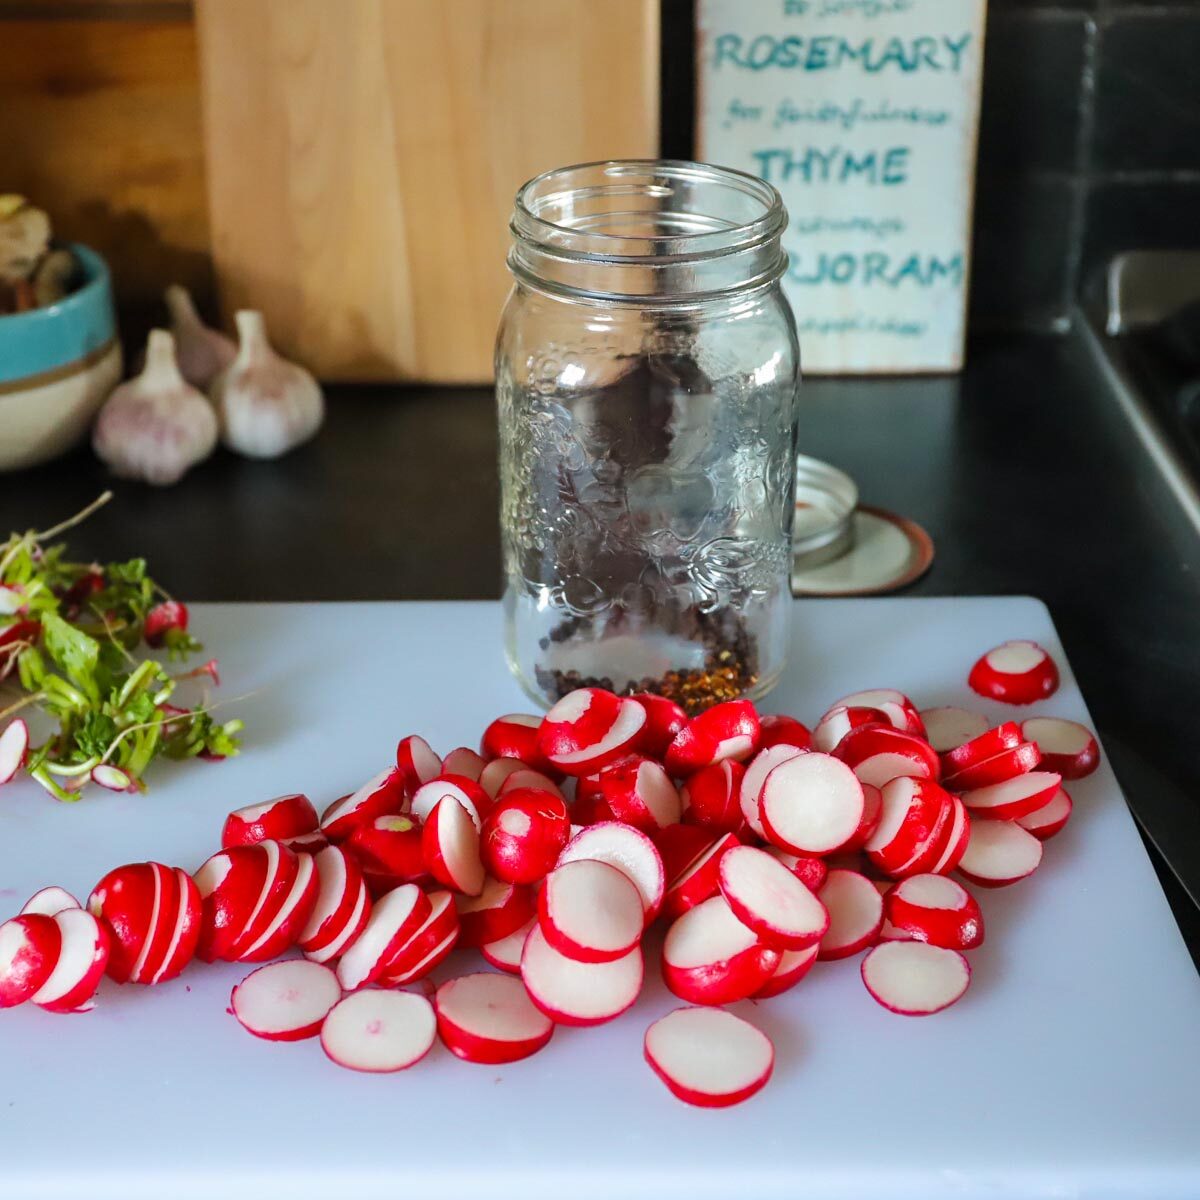
3. Wash radishes well. Remove tops and cut crosswise into even slices. I cut mine into ¼" rounds.
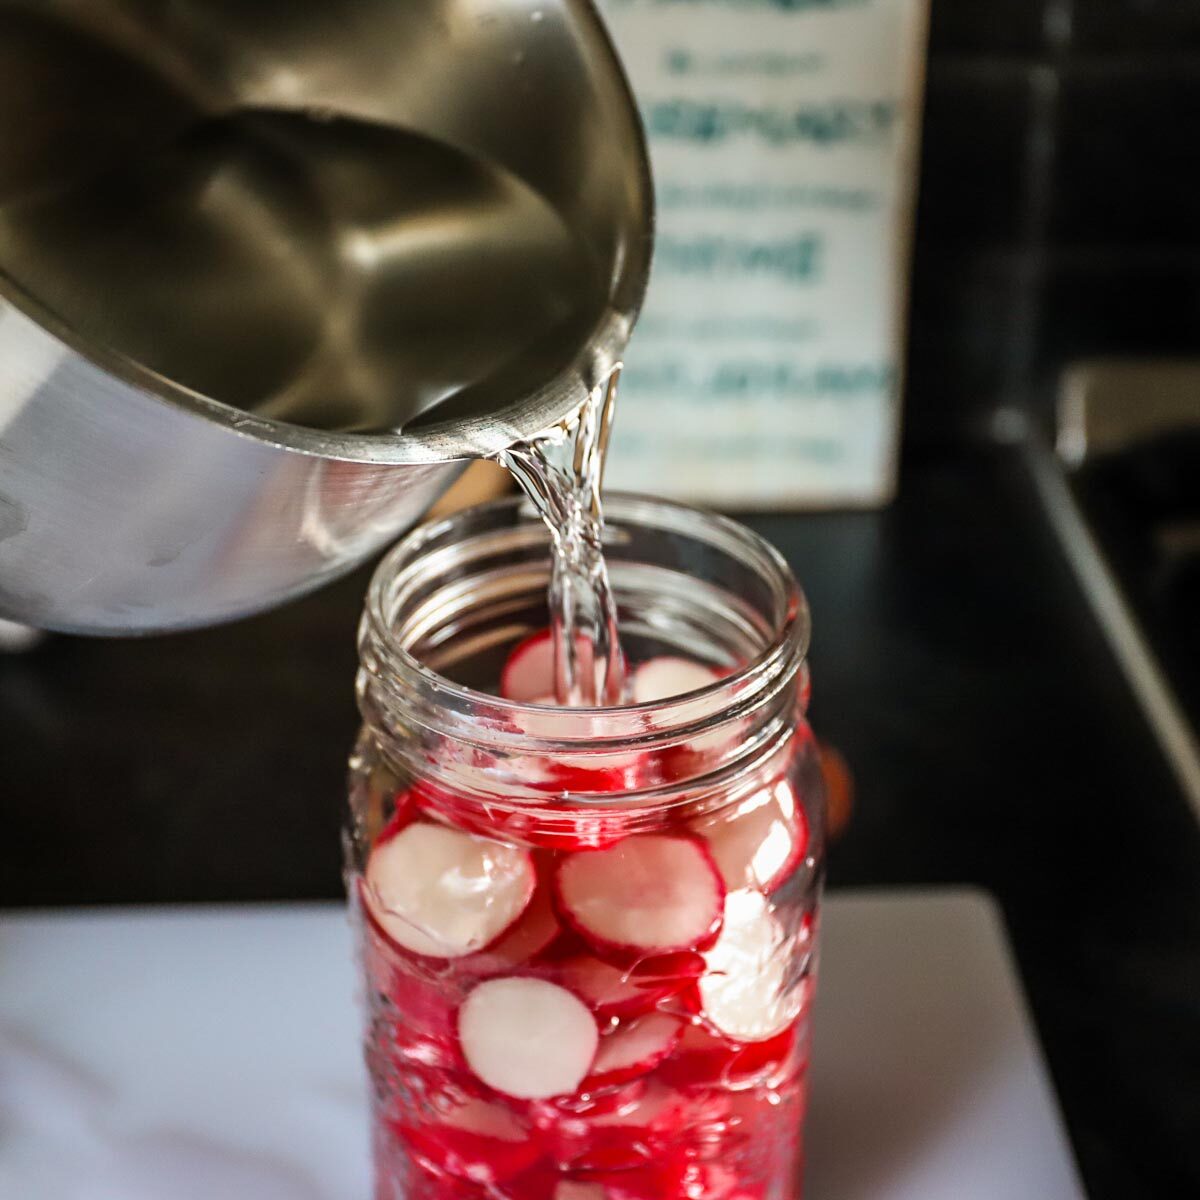
4. Add sliced radishes on top of spices and pack them in as evenly as possible, leaving slightly more than an inch of headspace at top of jar.
5. Next, pour your cooled brine in to top of vegetables. Be sure to leave enough space to add your fermenting weight.
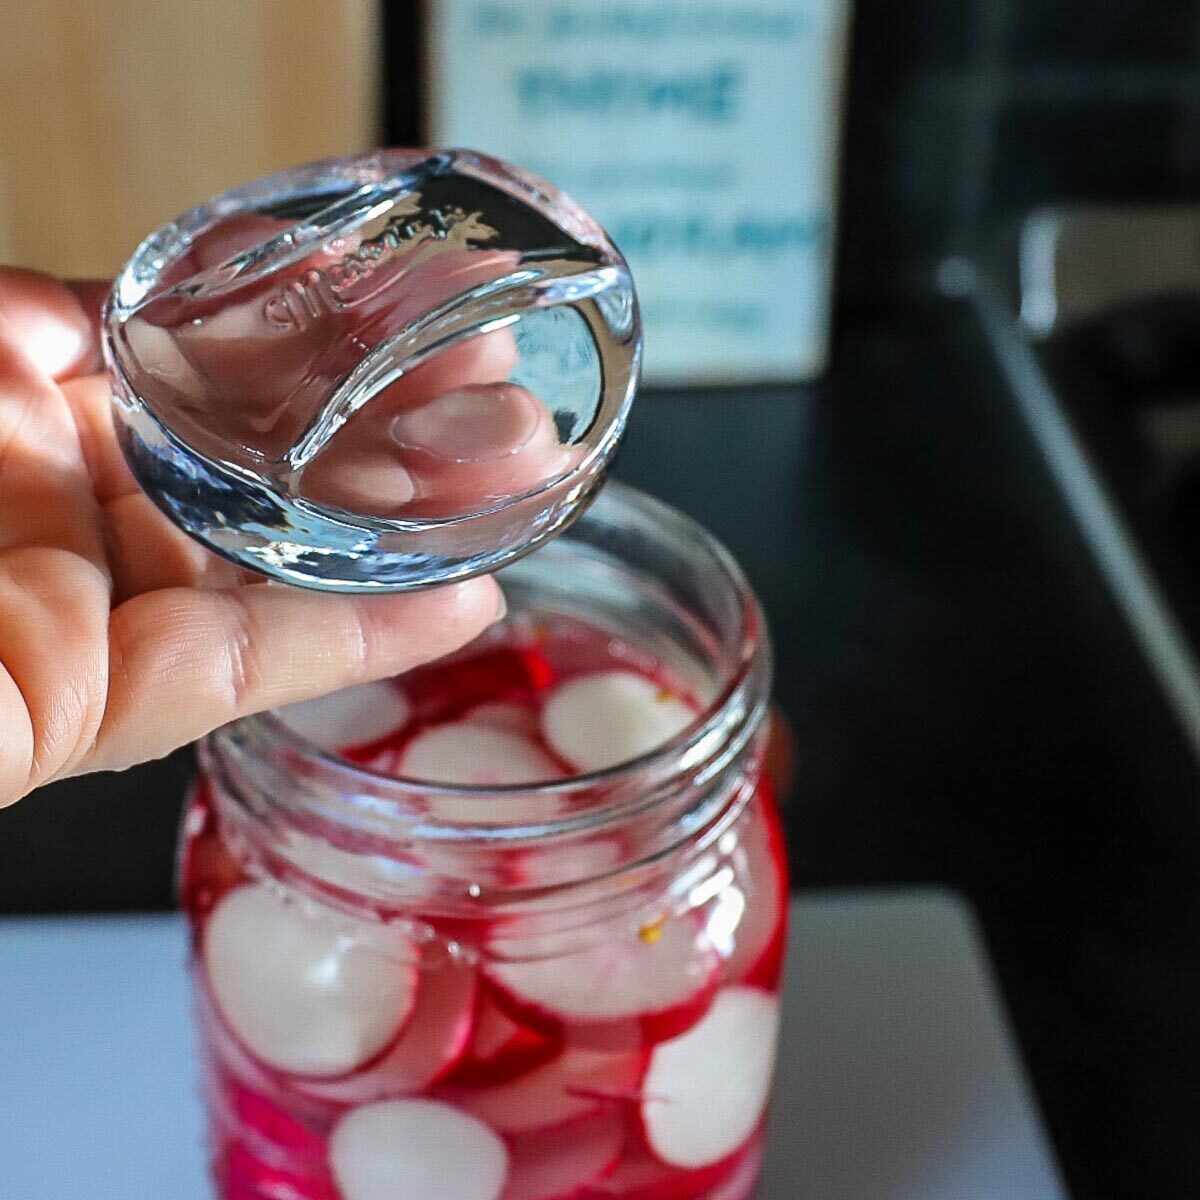
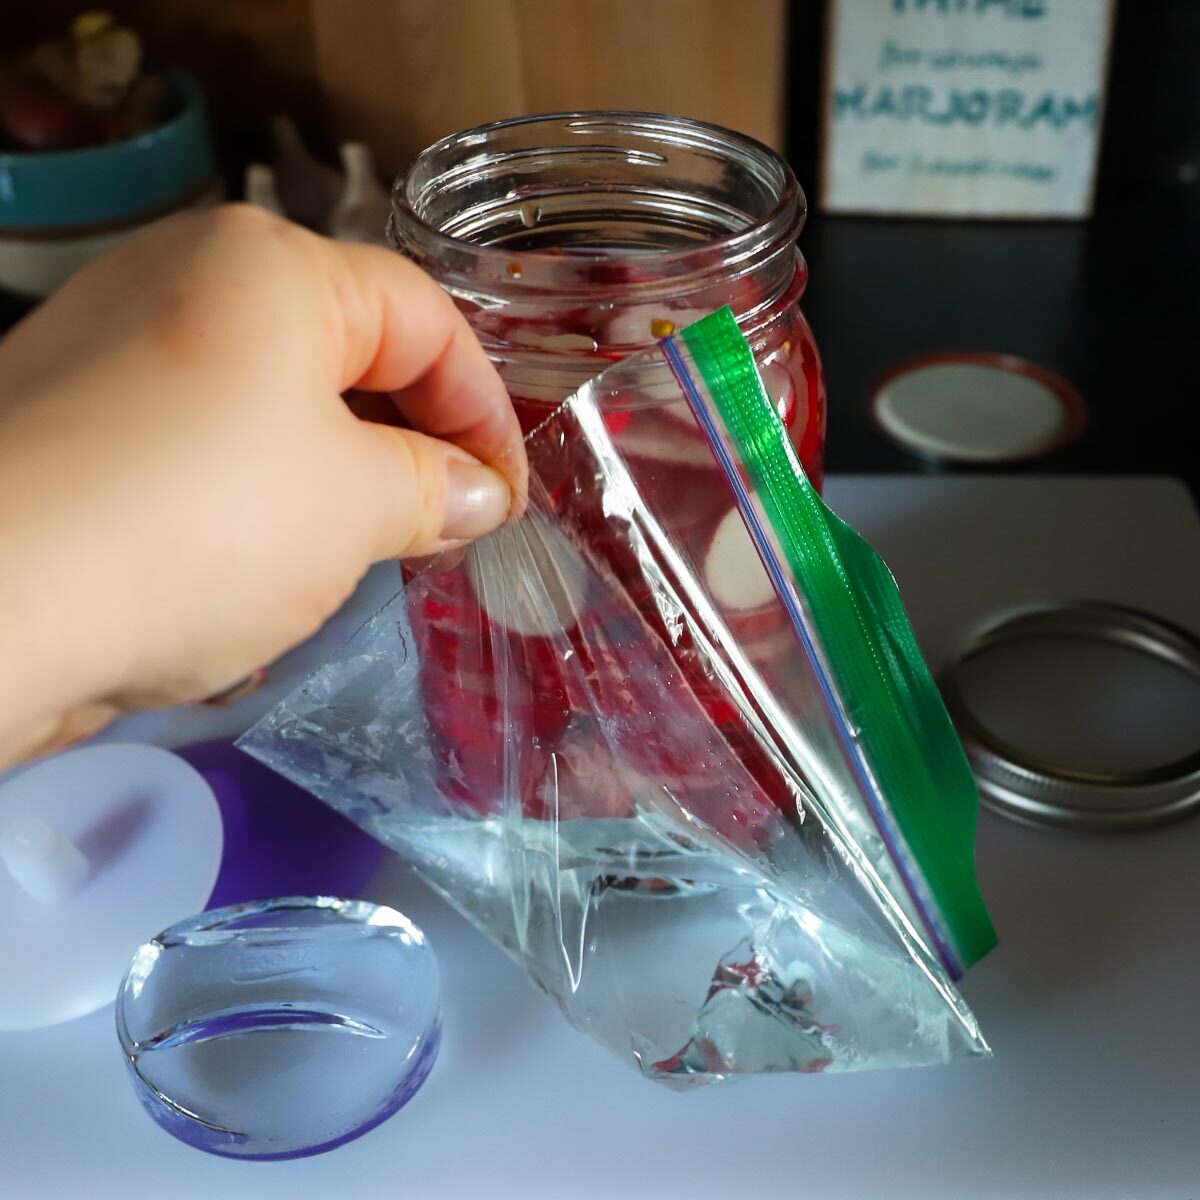
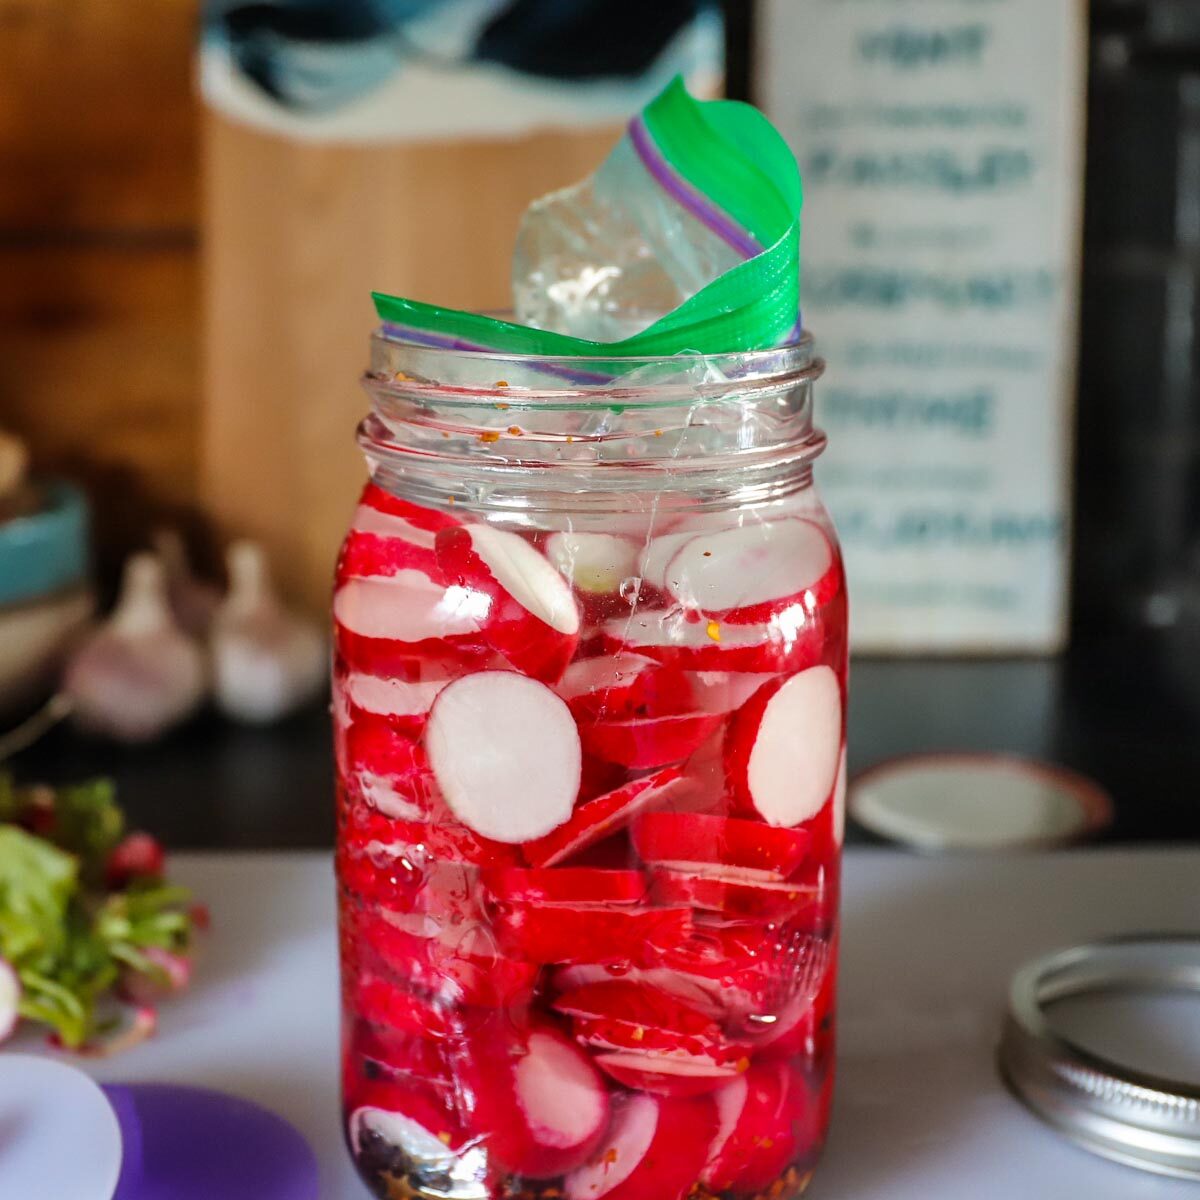
6. Top with fermenting weight to keep radishes submerged. If you don't have a fermenting weight or something similar, fill a small plastic bag with about ½ c water, seal and put on top of radishes. (See below for pictures of a homemade fermenting weight.)

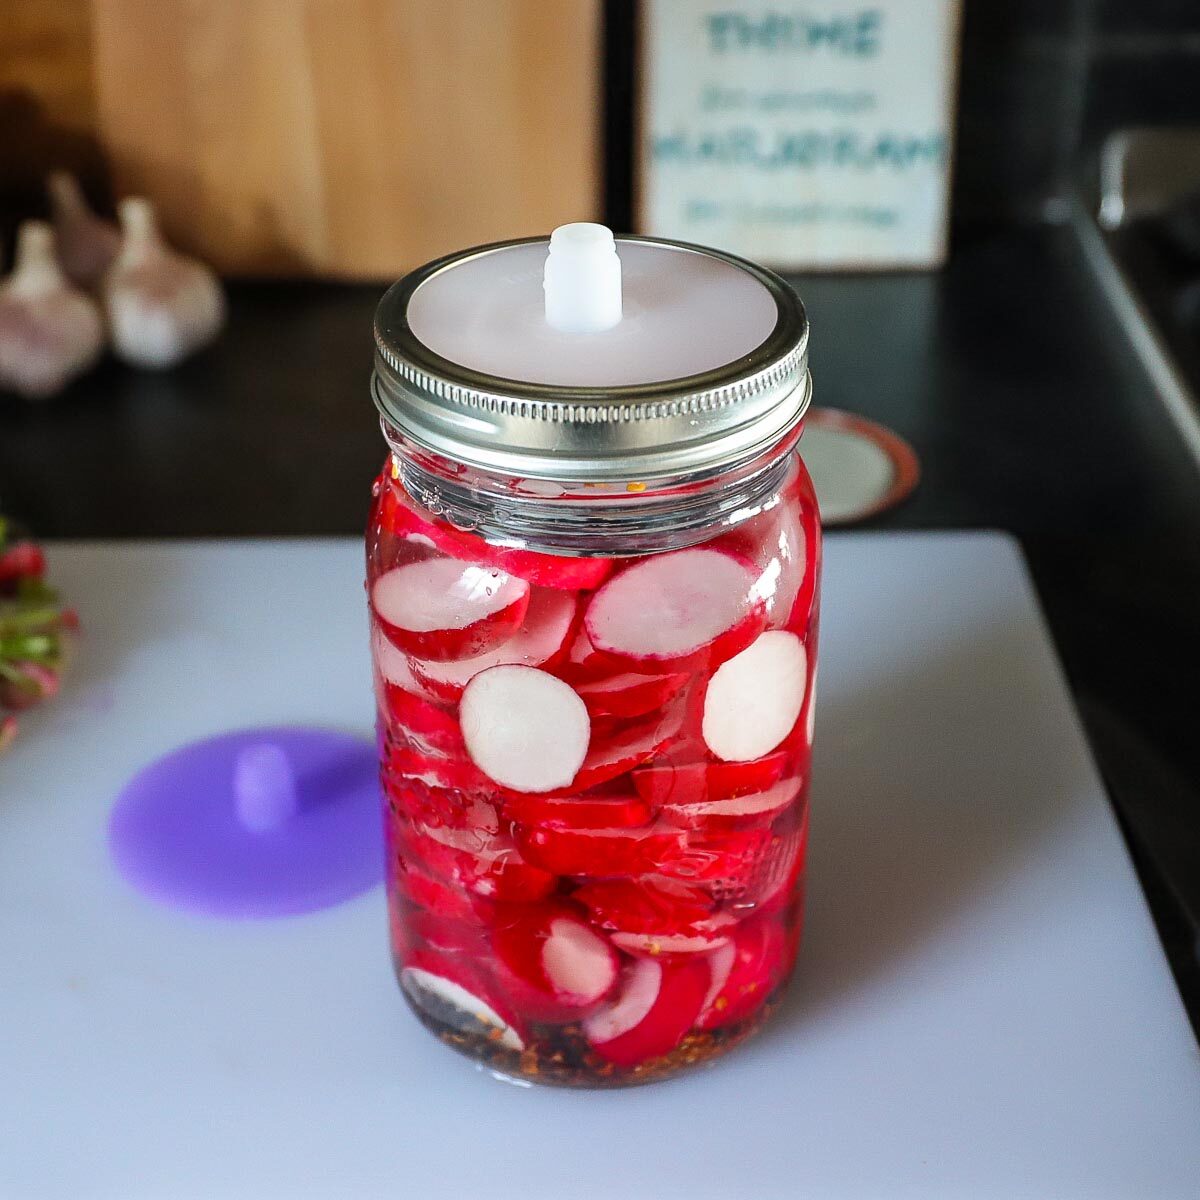
7. Close jar with airlock or pickle pipe and fasten gently with jar ring. If you don't have the special lids, put regular canning jar lids on and undo it once or twice a day to release gases (burping the jar) or use a coffee filter secured on top.
8. Leave to ferment at room temperature 5-10 days. These will likely turn cloudy as they start fermenting and small bubbles will occasionally be rising. The red from the radish skin will turn the brine a pink or orangey pink col
Once the initial fermentation period is over and have a pleasantly pickled and fermented flavor, these are ready to enjoy.
To store, top with a regular canning lid and move jar to cold storage if not storing in your fridge to eat right away. These will last 3-6 months if stored properly, harder vegetables tend to last longer than softer vegetables.
How to make your own homemade fermenting weight
Things to watch out for (though not common if proper sanitation and submersion are followed) are mold, pink fuzz, or a rotten smell (the good fermenting smell should remind you of sourdough bread or a brewery). If any of these things occur, toss the batch and start over making sure all your equipment is sterilized with hot water.
You can ferment any vegetable you would eat raw with this recipe. Simply follow the ratio of salt to filtered water in this recipe.
Be sure to use clean equipment and clean trimmed produce. Keep your veg fully submerged with a weight to prevent mold. Cover your ferment with a breathable top (pickle pipe, water airlock device, coffee filter or paper towel to prevent foreign bacteria from entering.
Try your favorite vegetables and play with size and texture. Shred them finer or cut them chunkier, and add different herbs and spices to make it your own.
The basics are clean uniformly sized produce, a salt water brine and a non-porous jar or crock to keep the fermenting food submerged, creating a safe and airless environment. Airlock lids or pickle pipe tops for mason jars and glass fermenting weights are great but if you are trying this for the first time, I'll tell you my easy hack to make your own.
Related Recipes


Radishes are one of my favourite fermented vegetables. They are delicious on top of tacos or huevos rancheros or as the perfect pairing to your lunchtime sandwich. I hope you love them too! (If you do, I'd love it if you'd give them a rating on the recipe card.)
If you have any questions or comments, you can find me on Instagram, Pinterest and Facebook. I try to answer any recipe related questions quickly as I know you might be in the middle of making it.
Also check out my FREE PRINTABLE meal planner to make menu planning and grocery shopping a breeze and my shopping guide. And if you like this recipe, I would love it if you give it a star rating in the recipe card.
Cheers and happy cooking, Friends! Sabrina
📖 Recipe

Fermented Radishes
Equipment
- Optional: airlock lids and pickle pipe tops
- 2 1-quart (liter) wide mouth mason jars, sterilized with boiling water before using
Ingredients
- 6 cups radishes
- 2 tablespoon peppercorns
- 1 teaspoon Red pepper flakes (Optional)
- 3 tablespoon kosher salt
- 6 cups filtered water or boiled 20 minutes to remove chlorine if on city water
Instructions
- Make a brine of 6 cups water to 3 tablespoon sea salt and stir to dissolve.
- Wash radishes well. Remove tops and cut crosswise into ¼" rounds.
- Place peppercorns and red pepper flakes in the bottom of each sterilized quart jar. Add sliced radishes on top of spices and pack them in as evenly as possible, leaving slightly more than an inch of headspace at top of jar.
- Pour brine over vegetables, leaving 1 inch of headspace (you may have some brine leftover). Top with fermenting weight to keep radishes submerged.
- Close jar with airlock or pickle pipe and fasten gently with jar ring. Leave to ferment at room temperature 5-10 days. These will likely turn cloudy as they start fermenting and small bubbles will occasionally be rising.
- Once the initial fermentation period is over (it is over when you decide you like how they taste), these are ready to enjoy. Top with a regular canning lid and move jar to cold storage if not storing in your fridge to eat right away.


Megan Ellam says
These look incredible. I am making some preserves now. Thanks for sharing
Sabrina Currie says
Thanks Megan 🙂
Andrew F Maurer says
What is the difference between "cold storage" and putting them in the fridge?
Sabrina Currie says
That's a really great question Andrew. I realize I've made assumptions when writing this. I consider cold storage to be a cool, dark room that maintains a fairly steady temperature throughout the year and at all times of day. The temperature should ideally be between 32°F-42°F (0°-5.5°C). Living in Canada, this is often achievable in a root cellar or back basement room, but as I think about your question, many places in the southern United States would not have such cool temperatures unless you use a fridge. So, if you don't have a reliable cold storage area, you should use the fridge.
(Additionally, cold storage can mean freezers and fermented foods should NOT BE FROZEN.)
Thank you and I hope my answer has helped. I will go about updating posts with this recommendation over the next little while.
Andrew F Maurer says
Perfect response, I greatly appreciate it. I'm in southern Minnesota so a backroom in the basement it is!
Katie says
Hi Sabrina!
Should you water bath can the radishes after they are done fermentation? How do you make them shelf stable?
Sabrina Currie says
Hi Katie, these need to be kept cold once they are fermented. In the fridge or other cold storage that is between 2-6 degrees Celsius.
These aren’t meant for canning as the heat would kill all the good probiotics.
To make a canned pickled radishes, I would use a pickling recipe with vinegar.
I hope that helps.
Cheers,
Sabrina
Kylie says
When fermenting for the 5-10 days at room temperature, can they be on the counter exposed to light or do they need to be in cupboard? Thanks so much!
Sabrina Currie says
Hi Kylie, great question. Ideally leave it in a dark place like a pantry but on the counter is fine, as long as it’s not in direct sunlight.
Todd says
Better to use metric system for measuring. Far more accurate measuring which is important when fermenting, predictable results for each batch, and if you’re interested it allows you to accurately tweak the salt ratio to determine your preference.
Sabrina Currie says
Hi Todd, that is true but I write my recipes for home cooks in North America. Most of my readers don’t have kitchen scales so by volume is how I write and test the recipes.