Last Updated on February 20, 2023 by Sabrina Currie
I'm so excited to share this adorable hedgehog cheeseball in time for the upcoming fall holidays! Salty, creamy and nutty, this little guy is the perfect centerpiece for a baby shower or holiday appetizer buffet. Quick and easy to make, this cheeseball is naturally gluten free making it perfect for a crowd.
Why I Love This Cheese Ball
Cheese balls are always popular at Thanksgiving and Christmas as well as baby and bridal showers. Easy to serve cold or at room temperature, it's a delicious cheese spread that goes well on buffets and is easy to bring to a potluck. Making it into a hedgehog cheeseball will put smiles on the faces of your guests.
This bacon cheddar ranch cheese ball can be easily made ahead, in fact it's even better made a day or two in advance. It's the perfect cocktail party food that stays put and isn't messy to eat standing. This is my favorite cheese ball recipe. It pairs well with wine too 😉
For more cheese ball recipes check out The Top 30+ Best Cheese Ball Recipes.
Jump to:
(Want to freeze it? Check out Can You Freeze a Cheeseball? How And Why To Do It)
I love cheesy recipes. This was inspired by my other party faves, Caramelized Onion and Blue Cheese Dip and Bacon Aioli. (Did I mention this cheesy recipe includes bacon too?)
For more cheese recipes, check out Brie and Apple Grilled Cheese, (Gluten Free) Broccoli Cheddar Soup and my fall favorite, Vegetarian Mushroom Melt.
Ingredients
With less than 10 easy ingredients that are available at any grocery store, this easy cheese ball recipe whips up fast!
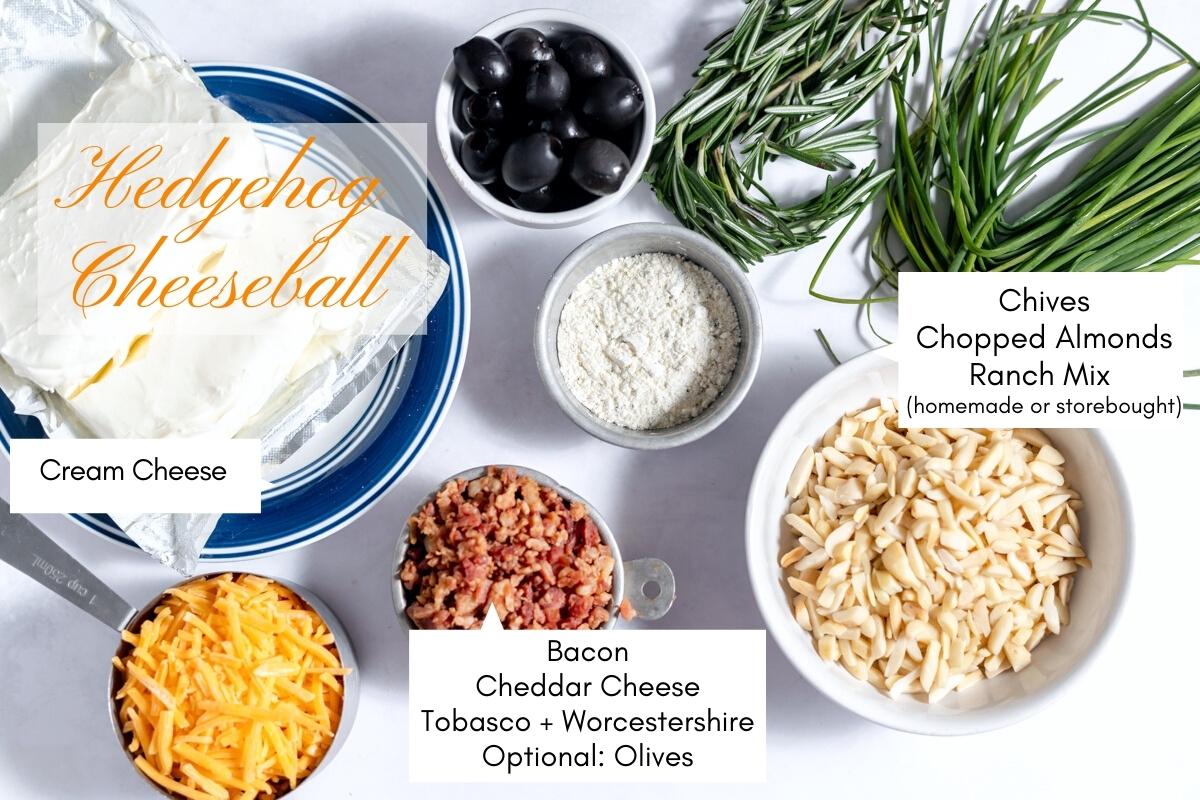
- Cream Cheese - For the firmest texture that holds it's shape well, use blocks of cream cheese, not the soft, spreadable stuff in a tub.
- Almonds - Slivered almonds make a great looking hedgehog but if you want to save time, you can roll your cheese ball in crushed almonds instead. The flavor will be the same.
- Ranch Dip Mix - Use your own homemade or buy your favorite packet. (Make sure it's gluten free if you require.) To make your own ranch mixture, combine 2 tablespoons each: dried parsley, dried onion powder and dried chives. Add 1 teaspoon each: garlic powder, dried dill and ½ teaspoon each salt and pepper. Many people add in ½ c of buttermilk powder too but since we are using tangy cream cheese for this recipe, you don't need the buttermilk powder if you don't have it handy.
See recipe card for quantities.
How To Video
Instructions
This recipe is SO EASY! Just dump all the ingredients (except nuts) into a bowl and mix it up. Shape your cute hedgehog cheese ball and insert the spiky almonds. Best done the day before, it leaves you free to enjoy the party.
Top Tip: Take your cream cheese and other ingredients out of the fridge ahead of time. Let them come to room temperature so they will blend easily.
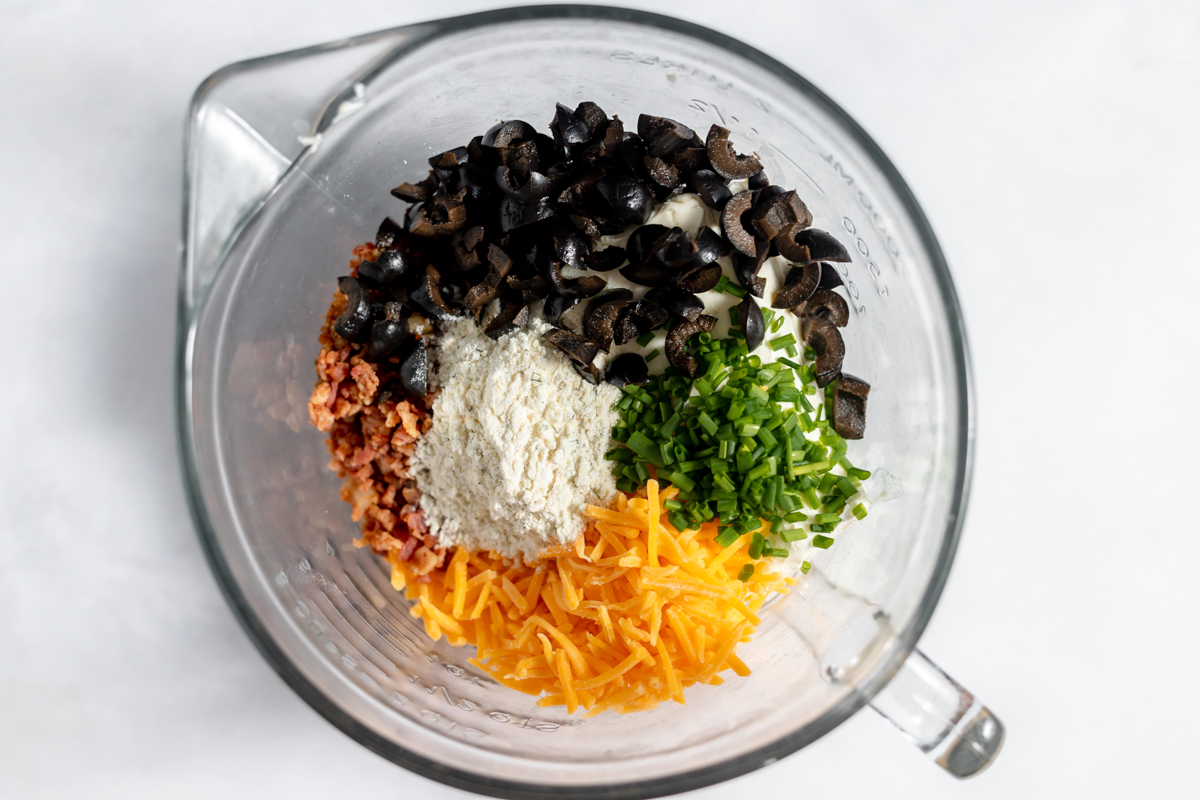
Add both cheeses, ranch mix, chives or green onion, olives, bacon, Tabasco and Worcestershire sauce to a medium sized mixing bowl.
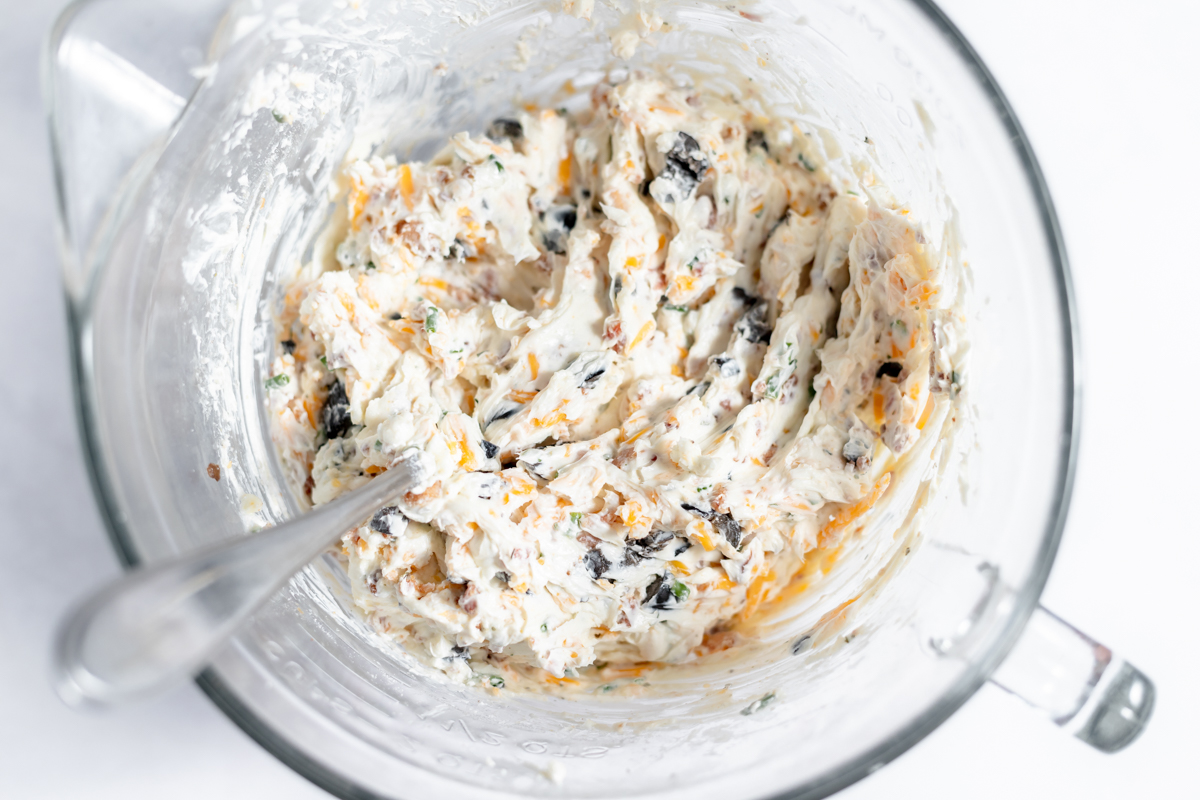
Mix cream cheese in well with a spoon or fork or process in your food processor. (You can also use a stand mixer with paddle attachment if you like.)
Season to taste with additional salt, pepper, Tobasco, Worcestershire sauce or a bit of lemon juice to taste. Stir well after any additions.

Scoop cheese ball mixture onto plastic wrap. Cover, press out extra air and gently shape into a loose pear shape as shown above.
Wrap tightly in a large piece of plastic wrap, and refrigerate until just before serving - at least an hour and up to 3 days.
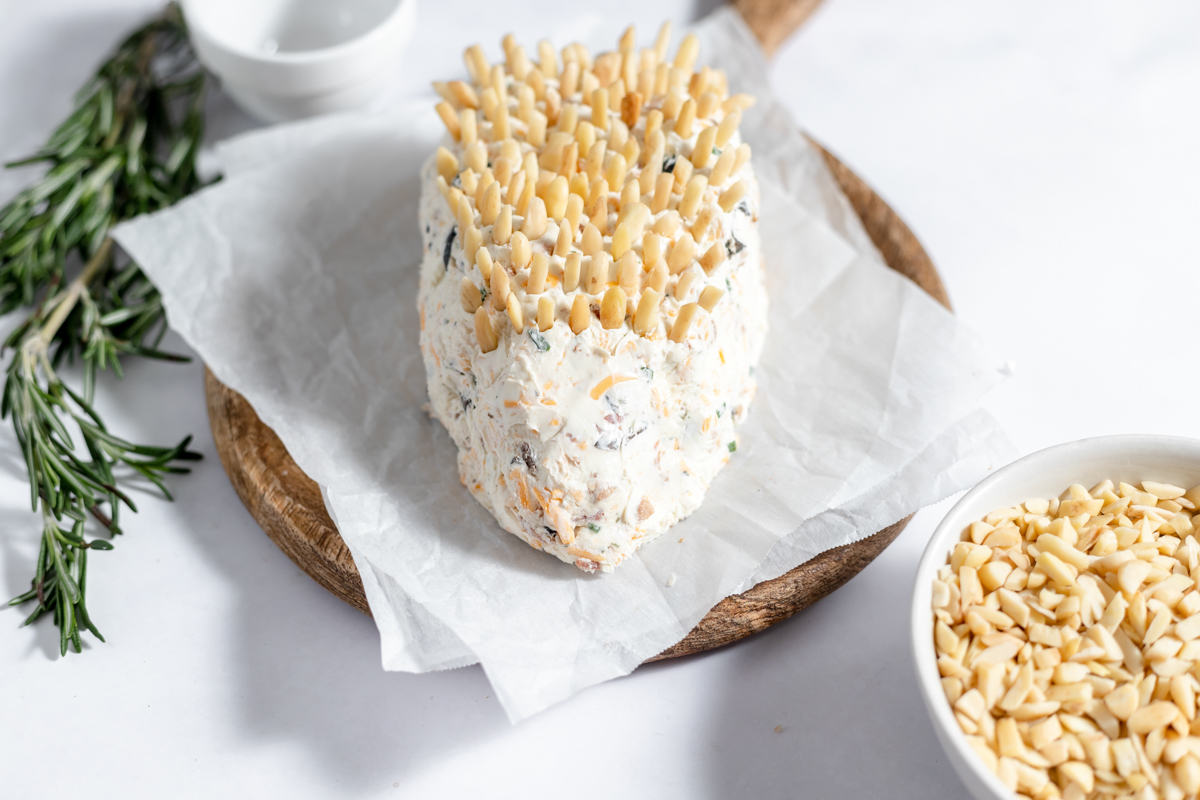
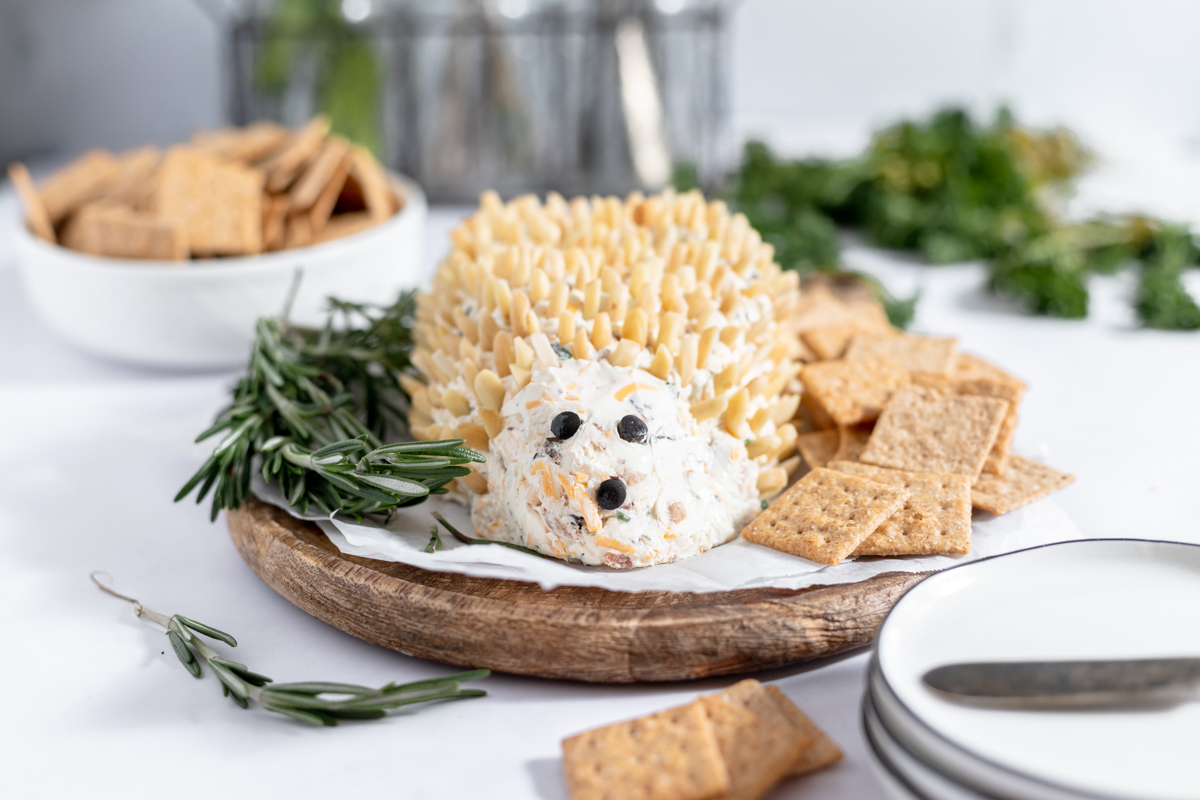
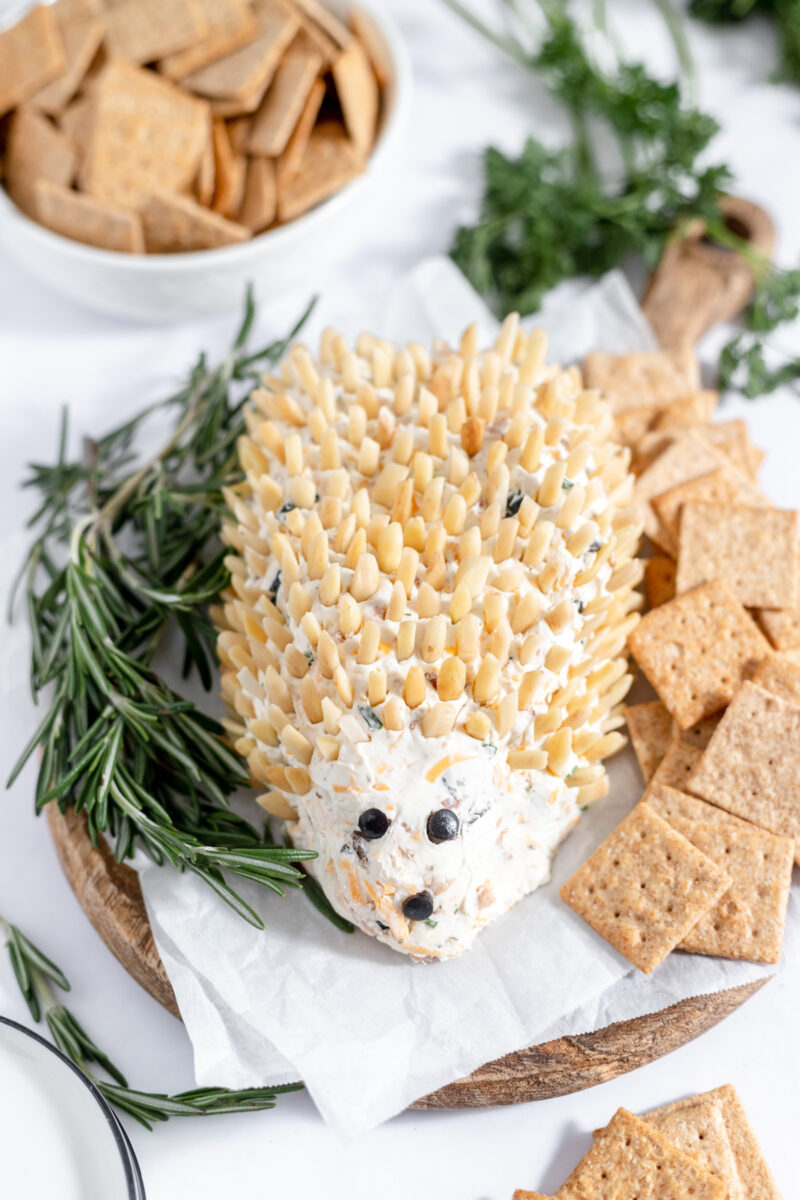
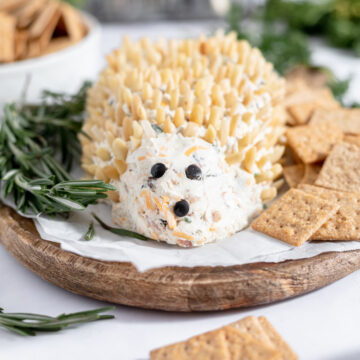
Before serving, uncover and place on parchment or serving platter. Place slivered almonds in, covering the back ⅔ of the hedgehog pointy end first so they stick up.
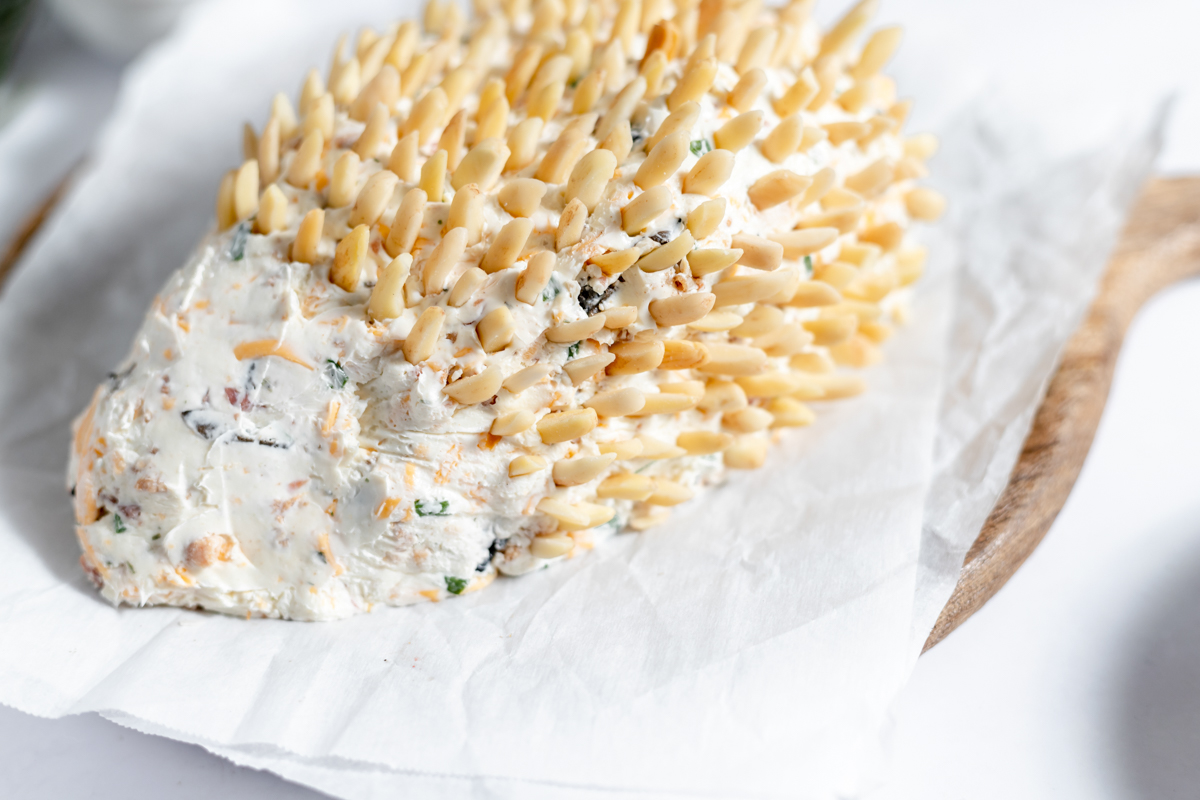
Continue studding the homemade cheese ball with almonds in offset rows until you've covered the main body area, leaving the face area untouched.
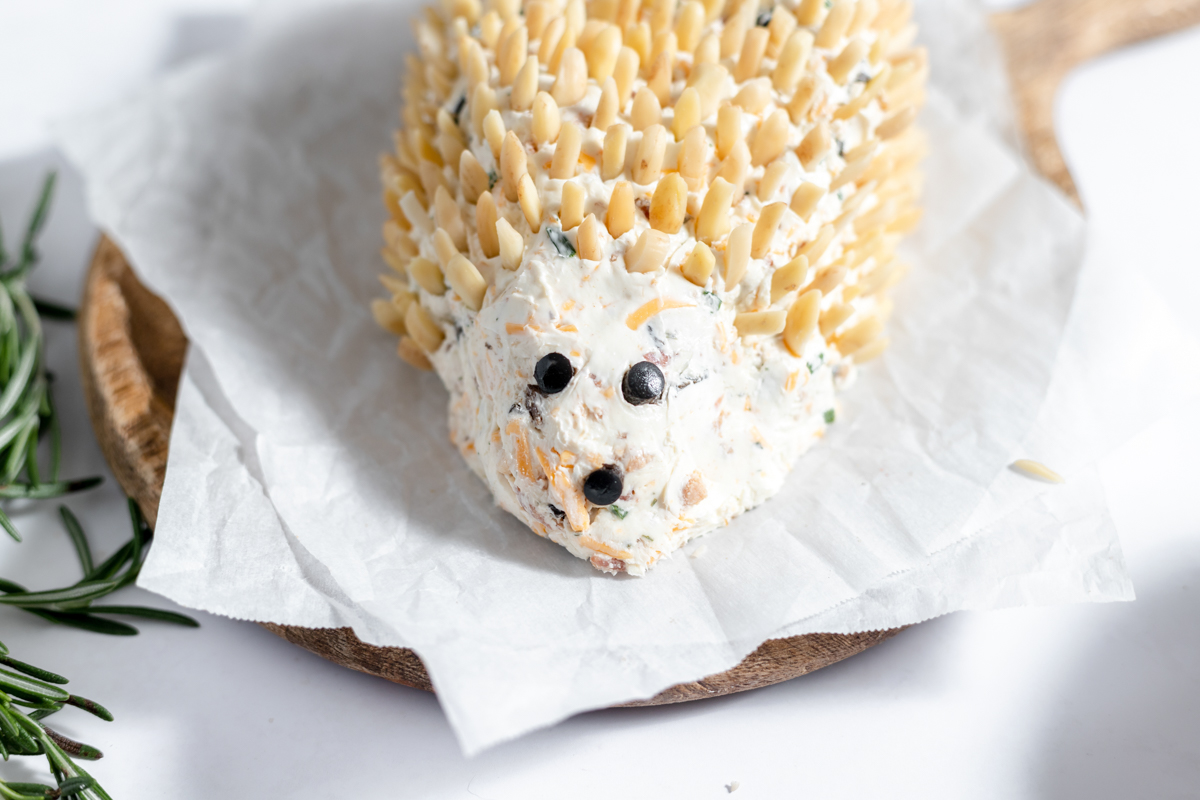
Cut some eyes and a mouth out of the remaining black olive and place them near the front. (Using a small round sharp object like a decorating tip from a pastry bag can help make perfect little circles.)
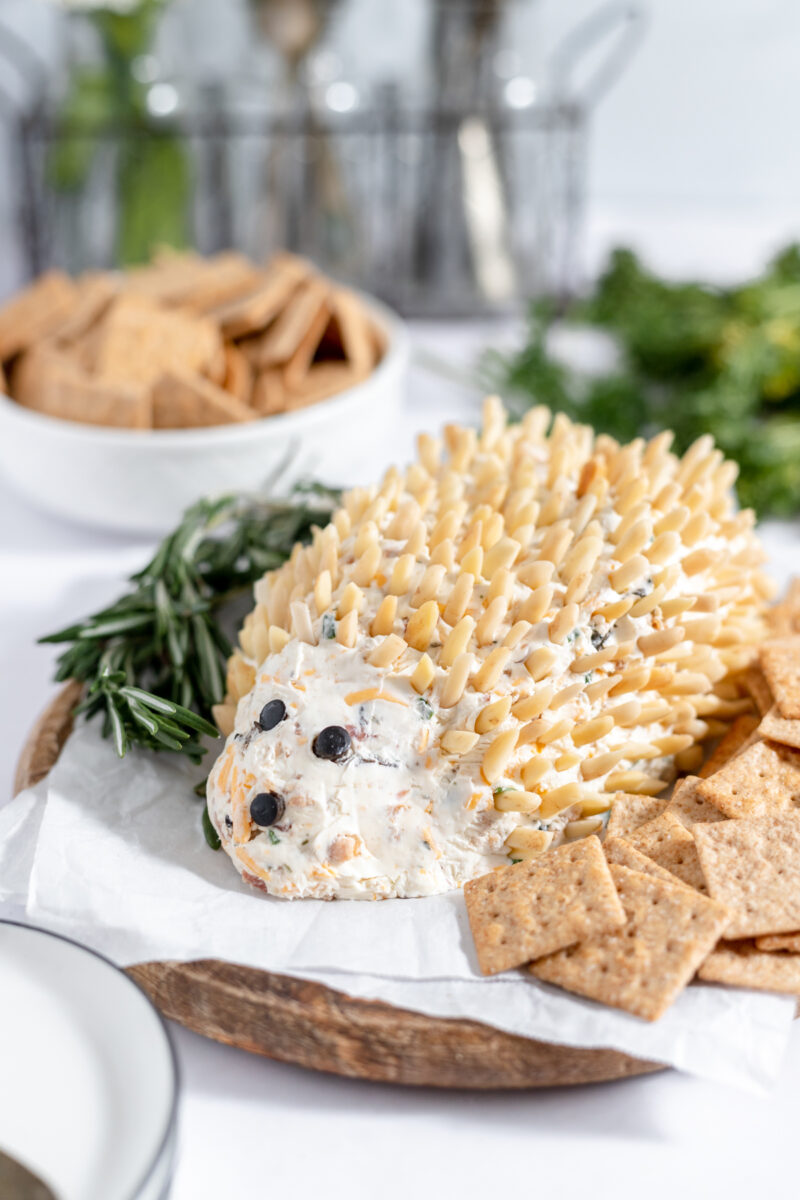
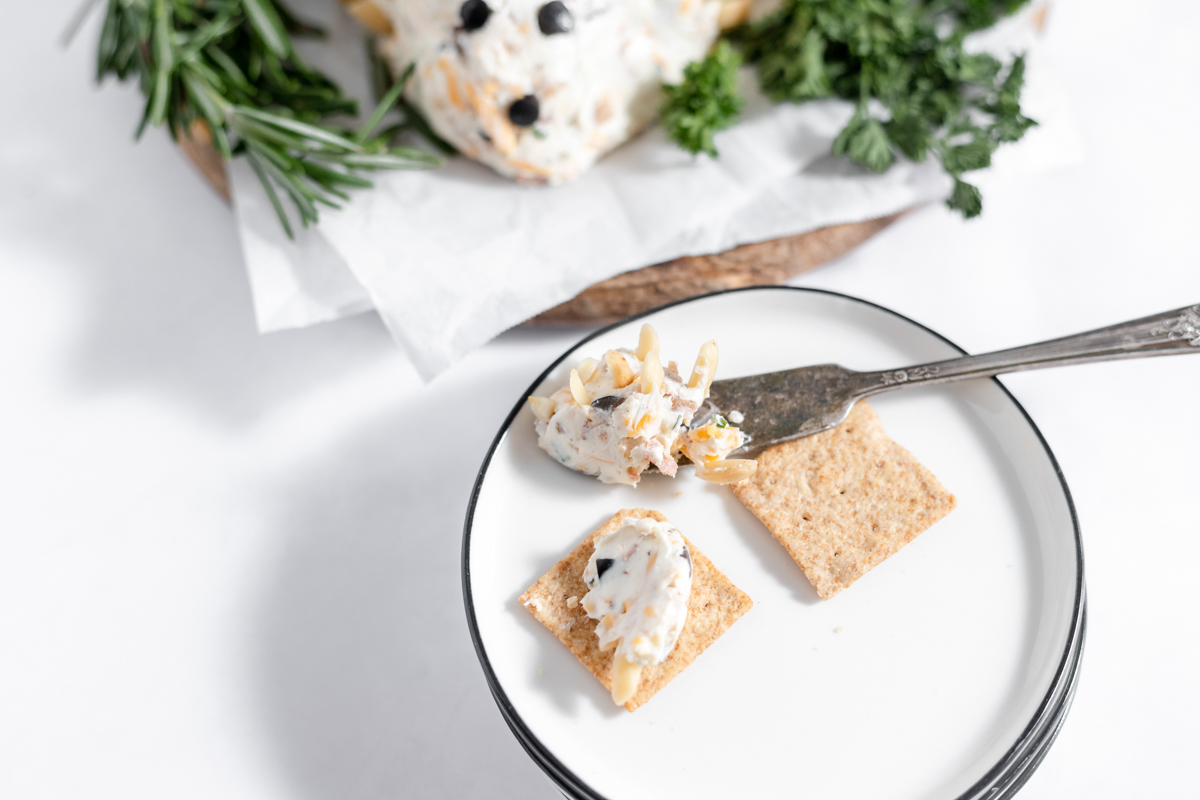
Serve the hedgehog cheeseball on a platter garnished with edible greens to finish the woodland theme. Serve with assorted crackers, slices of apple or pear dipped in lemon or fresh sliced vegetables. Have a small knife handy for spreading.
Substitutions
- Olives - It may be shocking but some people don't like black olives 😉 These add mild flavor and a little texture but you can omit them entirely if you prefer.
- Vegetarian - Feel free to use vegetarian 'bacon' bits or omit them to make this a vegetarian cheeseball.
- Nuts - You can used pecans instead of almonds for this recipe. They taste great but won't give the same spiky appearance as the almonds. Either chop them lengthwise and insert like the almond slivers or crush them and roll the body of the hedgehog in them.
Variations
- Pinecone Cheeseball - Use sliced instead of slivered almonds and shape the cheese into a pointed oval. Insert the sliced almonds on an angle, overlapping them like fish scales like a pine cone. Or get creative and try out other shapes too!
- Dill Pickle Cheeseball - Swap olives for an equal amount of finely diced dill pickles and omit bacon for a cheddar dill dip.
Equipment
To mix up a cheese ball, you can use a spoon and some elbow grease or turn to an electric mixer for a hand. A stand mixer, hand mixer or food processor all work well. Just be sure not to overmix if you like a little texture to your cheese ball.
Storage
A hedgehog cheese ball made with fresh ingredients will keep well, covered in the fridge for up to one week. If you are planning to make it ahead, leave the nuts off until the day you serve it.
You can freeze the cheese ball for up to 3 months (ideally without the nuts, again, add them just before serving). When ready to thaw, take it out and place it in the fridge, leaving it covered overnight. Remove from fridge the next day and add the almond garnish.
Please note that sometimes cheese gets a little crumbly after freezing. It won't affect safety or taste of the cheese ball but you may notice a slight change in the texture.
Thanks so much for reading along, I hope you enjoy this recipe. If you like it, I'd love if you could give it a star rating in the recipe card.
If you have any questions or comments, you can find me on Instagram, Pinterest and Facebook. I try to answer any recipe related questions quickly as I know you might be in the middle of making it.
Also check out my FREE PRINTABLE meal planner to make menu planning and grocery shopping a breeze and my shopping guide. And if you like this recipe, I would love it if you give it a star rating in the recipe card.
Cheers and happy cooking, Friends! Sabrina
Cheers, Friends
Sabrina
📖 Recipe
Easy Hedgehog Cheeseball With Almonds
Ingredients
- 2 c Cream Cheese 16 oz or 2 bricks, softened
- 1 c Cheddar Cheese, shredded 4 oz
- ½ c Bacon Bits
- 2 tablespoon Ranch Dressing Mix or 1 (1 oz) packet store bought
- ½ cup Canned Black Olives, chopped or sliced
- 2 tablespoon Chives, finely sliced
- ¾ c Slivered Almonds You may need more or less depending how densely you apply them on the cheese ball
- 5 dashes each, Tobasco and Worcestershire sauce
- Salt, Pepper + Lemon Juice to taste (I use approx ½ teaspoon of pepper and lemon. Cheese and bacon are salty so I don't find the need for extra salt.)
Instructions
- Combine cream cheese, cheddar cheese, bacon bits, Tobasco, Worcestershire, ranch mix, chives and olives (reserving one olive for the eyes and nose) and blend until well combined. Taste and season lightly with salt, pepper, Worcestershire, hot sauce or up to a teaspoon of lemon juice as desired. Stir well after adding any seasoning.
- Transfer from bowl to a large piece of Saran wrap, and shape into an oval, flattening one end, and tapering the other into a point.
- Wrap tightly in the plastic wrap, and refrigerate until just before serving - at least an hour and up to 3 days. Chilling overnight is ideal to let the flavors blend and meld perfectly.
- The day of serving, stud cheeseball with slivered almond, starting from the flat end, going in rows until you get a few inches from the tapered end. Offset the rows, starting your second row in the gaps of the first row to avoid looking too symmetrical.
- Once you get down toward the tapered end, cut three small circles out of your last olive (I used a wilton #12 decorating tip to punch them out), and arrange as the eyes and nose.
- Transfer to a cutting board or serving plate, and garnish with edible greenery such as rosemary, dill, or chives and serve with crackers or veggie sticks.
Notes
Nutrition
Food safety
- Don't leave food sitting out at room temperature for extended periods. All leftover food should be covered and refrigerated within 2 hours or thrown


Mzrian says
It won't let you email or print it!
Sabrina Currie says
Hmm, in the recipe card there is a print button. Once you tap that, hit print again and it should print to your printer if it’s set up. Good luck!